
Quick Start
Quick Start
This guide walks through every step from creating your account to adding your first asset.
Step 1: Create Your Account
Go to app2.batapp.co.za and click Sign Up. You'll need:
- Email address
- Password (minimum 6 characters)
- First and last name
- Agree to the Terms of Service and Privacy Policy
After submitting, batapp sends a 6-digit one-time password (OTP) to the email address you provided.
Verify Your Email
Check your inbox for the OTP email, then enter the code in the verification prompt. This confirms your email address and activates your account.
If you don't see the email, check your spam folder. You can also request a new code from the verification prompt.
Sign In
After you enter the correct OTP, batapp signs you in automatically. For future sign-ins, use your email and password. Google sign-in is also available.
Step 2: Create or Join an Organisation
After signing in for the first time, batapp needs to know which organisation you belong to.
Creating a New Organisation
If you're setting up batapp for your company, you'll be directed to create a new organisation.
As the creator, you're an Admin with full control over the organisation.
Joining an Existing Organisation
If your company already uses batapp, your admin will share a join link with you. There are two scenarios:
You already have a batapp account:
- Sign in to batapp
- Open the join link your admin shared
- Click Accept Invitation
- You're in — batapp switches to the new organisation
You don't have an account yet:
- Open the join link your admin shared
- Click Create Account
- Complete the sign-up form (email, password, name)
- Enter the 6-digit OTP sent to your email
- batapp signs you in and redirects you back to the join link
- Click Accept Invitation
When you join through a link, you're assigned the Viewer role by default (read-only access). Your admin will then upgrade your role to match your responsibilities — see Step 2b: Getting the Right Access below.
Step 2b: Getting the Right Access
New members who join via a link start as Viewers (read-only). If you need to add or edit assets, your admin needs to change your role.
For admins — to upgrade a new member's role:
- Go to Organisation → Members
- Find the member in the list
- Tap Edit on their entry
- Select the appropriate role:
- Editor — Can add, edit, and delete assets, types, categories, and locations
- Admin — Full control including member management, imports, and reports
- Save
If location-based access is enabled, you can also restrict the member to specific locations at this point.
See Roles & Permissions for the full breakdown of what each role can do.
Step 3: Set Up Your Structure
Before adding assets, set up your data hierarchy:
- Categories — High-level groupings (e.g. IT Equipment, Furniture, Vehicles)
- Types — Specific types within a category (e.g. Laptop, Desktop, Monitor under IT Equipment)
- Locations — Where assets physically are (e.g. Head Office / Floor 2 / Room 201)
You can always add more later, but having at least one category, type, and location lets you start adding assets immediately.
See Data Structure for planning advice.
Step 4: Add Your First Asset
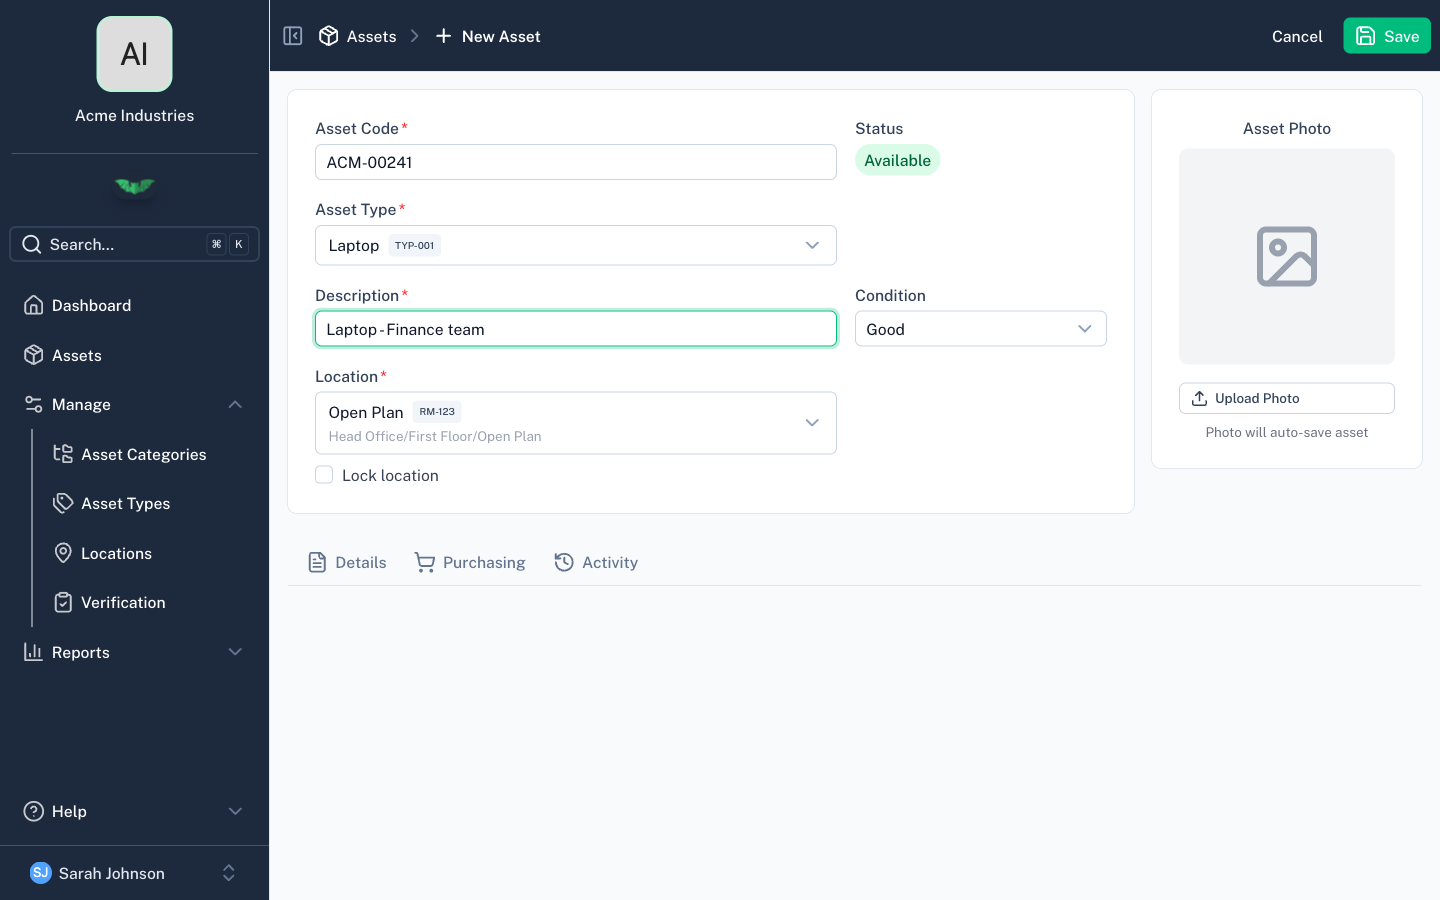
Navigate to the asset list and tap Add Asset. Fill in the required fields:
- Code — A unique identifier, typically from a barcode (e.g.
9981176214,IT-001) - Type — Select from the types you created (e.g. Dell Latitude 5540)
- Description — By default it has the info of the type you selected, but you can add extra detail here
- Location — Where the asset is
- Status — Defaults to Available
Save, and you've got your first tracked asset.
Step 5: Find Your Way Around
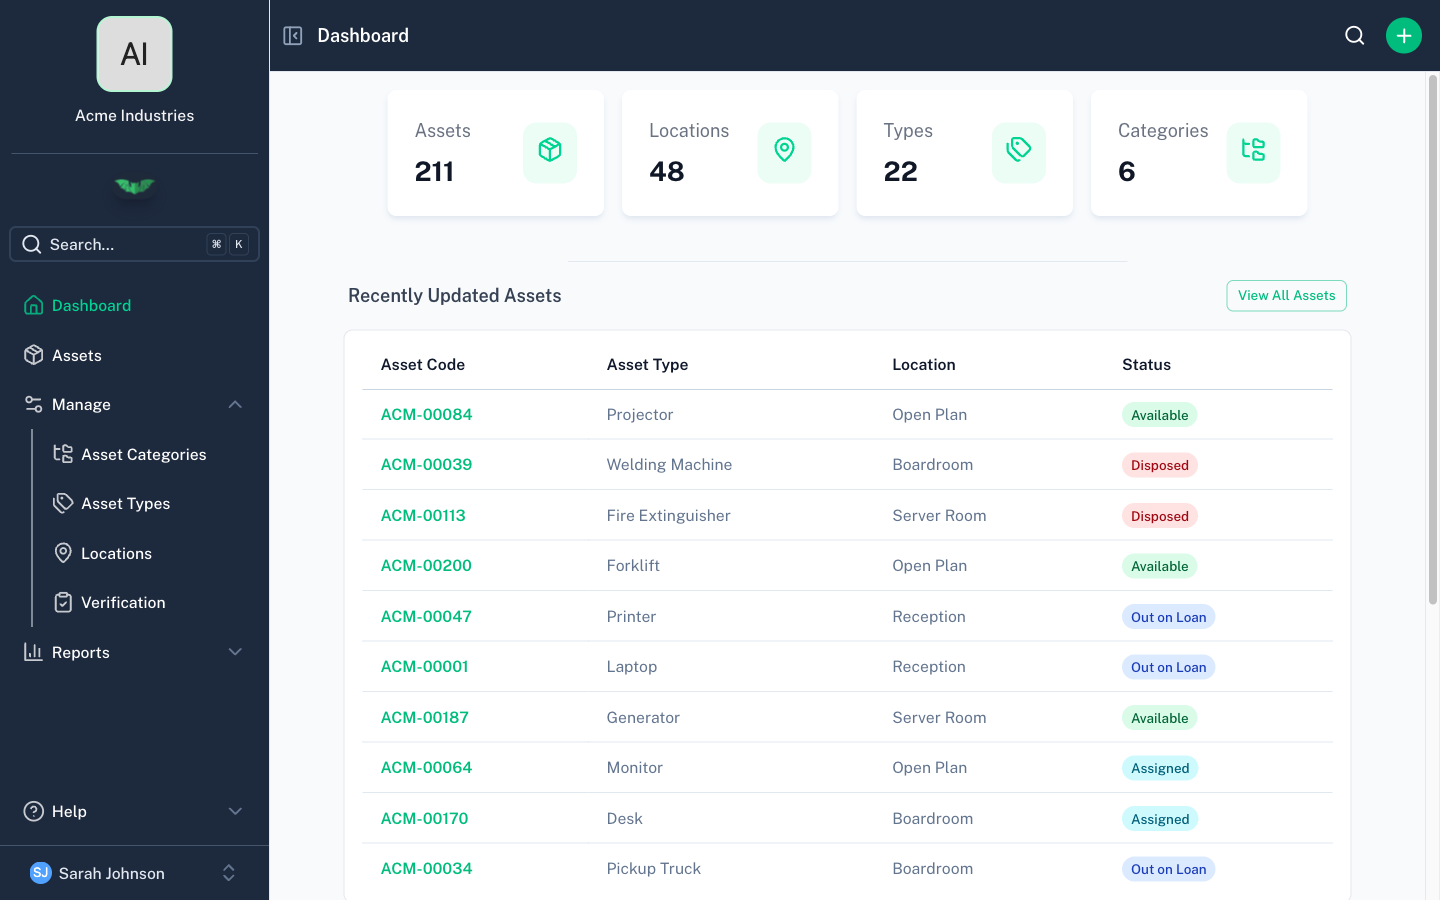
The dashboard shows your most recent assets and quick-add buttons for assets, types, locations, and categories.
The sidebar is your main navigation — asset list, reports, and data management sections (categories, types, locations) are all there.
For organisation settings, hover on the organisation logo and click the settings icon.
Next Steps
- Data Structure — Understand the category → type → asset hierarchy
- Roles & Permissions — Set up your team
- Import — Bulk import existing assets from CSV
- Mobile App — Install the Android or iOS app for scanning and offline access